The Beginning & Overview Of My Project

So I am starting a blog on the conversion of my original dedicated Nintendo Popeye Cabinet to a Donkey Kong 60 in 1 Cabinet! Yes I understand there are umpteen bajillion DK Restore sites on the net and that's fine and dandy we got it, but how many do you have using the components of your Ninty cab and making it accept jamma? think it about it for awhile...take all the time you need....

So being there really is none and very little info on it I'm going to go ahead and post photos and information on my project to help those out there that might be considering doing the same thing! I do understand there are a few individuals out there who believe regardless of ownership all cabinets should be restored to their previous "glory" those said people are the same individuals who disappear when you ask them to help out with the financial burden of undertaking such a feat. So to those people tough tootles!

So As of now I have a dedicated Popeye cabinet as mentioned fully working though in rough shape including but not limited to faded monitor, missing side art, large scratches in sides and front, beat up base, scratched bezel, cracked marquee etc... The machine has seen better days! I initially bought the cabinet for $250 with intent to restore as Popeye but after playing the game hundreds of times I'm just well....bored of it.
We have a local Pizza parlor that currently has a restored DK Cab in it that makes me gitsy every time I see the damn thing and I love DK so I figured why not?

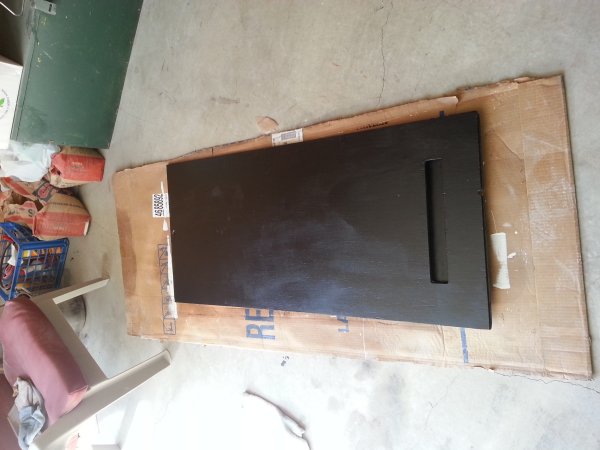
1. Strip Cabinet of all components
2. Bondo/Repair all Knick, Dings etc
3. Sand & Paint Cabinet
4. Cap The Monitor
5. Install all brand New DK Silk Screened Plexi Marquee, Bezel, CPO & Side Art
6. New T-Molding
7. Install 60 in 1 Jamma PCB

So why the 60 in 1 when you want DK? Why not build a MAME Machine? ok 1st off I built a MAME cabinet nearly 10 years ago after dumping a few grand into making an amazing looking cab that has everything I ever wanted (pictured to the right) there's something about the feel of an original arcade machine vs a Mame cabinet, especially the Nintendo games! So lets get to the figures though $250 for the cabinet with working components, $200 for all new side art, Marquee, Bezel, CPO & Additional placement stickers so that's $450 so far! Now anyone priced or can find a Working Donkey Kong PCB & Power supply? not to mention the harness if your going for a 4 Board? On a Good Day a fully restored DK Cab will run you on avg $700-900 now at $450 (Not including Paint, T-Molding, Misc supplies) + 200-250 for the DK PCB/PS/Harness your already in the ballpark of $700! Take the 60 In 1 Route an additional $110 to your $450 your looking more in the $600 ballpark, A profit can be made here and you don't have to worry in the end if you could have saved money by buying a restored one instead!

I personally don't care if the donkey Kong I am playing is %100 authentic as long as it works, now that should simply be the end of story as its "my" private machine in "my" household but to simply throw it out there it does in fact make me cringe when someone chops up and hacks a perfectly good working arcade machine when the time and money dispensed into creating a mame machine could have been cheaper by simply acquiring an old non working beyond completion arcade cabinet. So therefore I have planned this so All Popeye parts will be boxed and shelved in the event if I ever sale it the buyer has 2 simple options: 1: obtain the DK power supply & PCB and just simply plug & Play as nothing is getting chopped or hacked! or... acquire Popeye Side art and put the pieces back in and have a great looking Popeye machine!

I intend to start the project Early next month when I place the order for all the parts in the meantime I have been simply disassembling it as I have cleared my basement to set up shop for completing it! Hope you enjoy!

Taking Apart The Cabinet

So Today I took on the feat of disassembling everything in the cabinet. As there are allot of wires going every which way and that I first decided to get some masking tape and a sharpy, from there I simply put a letter and placed the tape with corresponding letters on each end of the wires so it would be easy to identify which wires connected to what. I followed up with taking "allot" of photos for visual reference. Collecting all sets of screws I placed them in individual zip lock bags with sharpie labels, its always seems when you start a project if you get side tracked for awhile when you come back to it you seem to forget things, this way i ensure nothing is forgotten :)

The harness, monitor & power supply block were very quick and easy to remove with no hassle the coin door on the other hand became the longest process as the two bottom bolts are in line with the shelf that holds the coin box making it very difficult to get at them, not to mention they wouldn't budge!!! As for a quick note on removing the monitor for those "very few" who are not aware of discharging a cathode, you need to look it up!!! The monitor can essentially carry a lethal shock so it is very important you know precautions before removing the monitor.

 So with everything disassembled there was a lot of dust, extra screws, chopstick wrappers and dead spiders... Vacuumed out  and the next bit is to remove the side art and other stickers from the cabinet. Though on a side note I never understood why I had all 10 holes in the side of my cab if it was never vertically mounted? not to mention the board below the monitor had 3 holes in as if there were a bracket there at one time.I also noted an extra hole in the bottom of the control panel with additional wiring and from a google search it appears this a part of all ninty cabs for a conversion to sky skipper.. 

Next step of the project will to fully remove side art and add bondo to the cabinet and begin the sanding & shaping process!

Ordering Parts & Getting Prepped

So I last had the cabinet completely stripped. I just finished removing the Side Art from the side where it remained with the coin door sticker. The Side Art was easy to remove with a razor blade and came off in many pieces it was obvious the sticker was original and just old. I now have all the sticky residue left over that needs to be removed. I picked up some bondo but appears from talking to people I also need to pick up some 3M Adhesive remover to get the gunk off before I can start patching and sanding.


I have been a bit lazy about the project as of late when i was determined to have a good amount done this month so I went ahead and ordered the parts from Arcadeshop.Com this included the Marquee, Bezel, Side Art, Control Panel overlay CPO/Marquee/Coin stickers as Well I figured having some of the new parts would help motivate me to getting it done. In the meantime I need to get some sandpaper and adhesive remover. Primer & Paint and I should be a step closer to getting this done :)

UPDATE
So I ended up picking up some 3M Adhesive remover from the auto section at walmart. When getting home and trying it out I had to develop a technique in order to get the damn goop off of the side. I would spray quickly then use a razor blade on the area. I found if i kept scraping it would dry up quickly causing the gunk to reattach to the cabinet. I would learn the quickest and most effective way to do this process was to hold the razor in one hand with the 3M can in the other with a shop rag laying on the side of the cabinet. I would spray a small area use the razor on it and essentially move the razor in a circle and then scoop up the removed goop with the razor and wipe it off on the rag and continue to the next area.

With the amount of effort it took to get this sticker off, I am now pretty positive whatever was on my cabinet was not adhesive but some sort of glue. I was really thick, came off in large pieces that did not lose its elasticity and was in yellowish color. The other stickers came off with little to no effort whatsoever. I have posted a picture if you click on it you can see within the white line I circled where it is and how yellowish and thick it looks.


You could in essence just sand it off but I can only see that taking more time and sand paper in the end. I have herd of goof off and other products but I will have to say the 3M Adhesive remover is the best product and has worked better than any of the others I have used in the past. Now time for the Bondo!

Review Of New Parts that have Arrvied!

So it wasn't 2 weeks ago I'm calling an 800# in effort to order the parts needed to convert my cabinet to Donkey Kong when a lady answers the phone with a stand offish attitude asking me "What do you need?" Against my gut instinct I read her off the list I needed, she promptly asked for my address without confirming my order, then my name, CC# and CVC code and just tried to end the call with "That will be shipped"  I wasn't going to accept this, how much do i owe? When will it ship? an order #? Are you positive you have my order right? How will I know a tracking #? needless I started prompting for answers she simply said she could send me a confirmation email when it was sent so I gave her the E-Mail address sure enough later that day got an email with a tracking and order # on it (No price, had to check my pending charges to figure that out)

So yesterday came and so did UPS with my box in hand, I was a bit nervous at first but as soon as I opened the box everything I ordered was there with a packing slip on the top! included in the box was all Donkey Kong Parts inc+luding: Bezel, CPO, CP Instruction Card, Bezel Sticker, Side Art, Marquee and Coin Sticker! I was a little shocked & Impressed at the same time, to hell with customer service with Arcadeshop.Com but they do in fact fill the order and deliver on time, So i guess that's all that matters!  So I will explain each one of the items a little for those of you thinking about purchasing from them and the quality and how it compares to the original.

First off Bezel $45: as all parts the bezel is no exception it is silk screened onto tinted plexiglass and gives off a nice NOS feel with the masking still attached to the plexi. The colors and details are all there! the silk screen feels like a high quality job as does the feel of plexi, maybe the thickness is what makes some feel cheaper than others but was more than satisfied with the product. In relation to the original Bezels the only difference I can see is the tint on the bezel is not "As" dark as the originals but very minor difference if any would be noticed once installed - secondly the NOS Ninty Bezels have a metal frame clasped to the bottom of the bezels; I assume this was to fill width - this bezel does not include that though I'm sure you can remove it from an old one and attach to this one Im just scared to ruin the printing.

Marquee $40: The Marquee Looks a little "too" good/New compared to an original and there could be a couple reasons why...Maybe the fact its not 32 years old? Needless I believe a trained I could spot this one with no strain, yes the quality is great but I get the feeling the plexi is actually thicker than originals. I like how nice it looks but when looking through it, it just seems the graphics are further back but I could be wrong, needless anyone in need of a new Donkey Kong marquee that didn't have to have "Original" would love having this replacement part.

Control Panel Overlay $40: once again another silk screen plexi part beats the hell out of a cheap sticker to just stick on something makeshift and looks so much more authentic! I held this piece up to my Popeye CPO and the thickness was identical, The graphics were beautiful and all the holes matched up properly. Now in terms of matching up to the original my only slight complaint about this piece is that its a little less than a mm off. Its noticeable around all the holes the graphics were either printed a tad off or the holes were drilled a tad off, I think the latter. Let me express though this is only noticeable around the holes and keep in mind when all the bolts and buttons have been installed you will no longer be able to see this.

Side Art $69: This is the product that brought me to the store in the first place as I have herad other people say hands down they have the best reproductions available and after feeling the new side art I will have to agree. It's dead on obvious they spared no expense to create "Quality" art and as many different sites on the net selling it (produced in many different ways) you need to be able to cut through the bullshit and get what the best is! The side art is on thick sturdy vinyl with masking over the graphic for extra protection. They sent the side art to me rolled up, this can be frustrating to apply in this shape and sometimes without weeks of heavy pressure or weathering its going to remain that way but I simply placed the bezel and marquee on top of it on the carpet with the box it came on for roughly 7 hours when I removed the sideart was flat!

Those who may not know there are two types of donkey Kong Sideart floating around out there and the prices very anywhere from $40 - $85 notice the pictures included circled is Donkey Kong's Arm, in the pic on the right you will notice allot more jagged edges and no tan part of fur in that section as in the other including the original on the left not so jagged including the extra detail of the tan fur in which ArcadeShop.Com has! (Also there are more than just that difference) so for $69 for high quality closest to original I'm happy. Also Keep In Mind look at the pic below to see cheaply made sideart that is also being sold out there.

Beware of the following Sellers of DK Side Art

reprocade.com: This side art is simply ink jet printed graphics copied directly from the arcade library onto adhesive low quality(pic to the left)
Mikes Arcade: Does in fact have masked die cut side art but is using an old silk screen run that has many discrepancies with jagged edges which to a trained eye looks like crap.
Quarter Arcade: Also using the old silk screen run graphics but printed on cheap glossy adhesive not die cut no masking
EBay: Need I explain?

Bezel Sticker/CP Card/ Coin Sticker $10: For the remaining stickers they are all printed on 3M stock indicating they are of great quality, these are certainly no home desk jet printer crap many are trying to sale, the stock is thick, Coin Sticker is Masked, absolutely no pix-elation crisp clear, glossy! In terms of how they stand up to the original? Well to be honest the CP Card looks Identical but as for the Bezel  Coin Stickers.. They are of "Better" quality than the originals, the gloss & thickness give it away but they damn sure look better as well!

 So overall I am extremely impressed with the Quality of reproductions and happy I went this route purchasing everything vs fishing for all the items individually on craigslist or Ebay and hoping for a good looking piece. In the world of purchasing "You get what you pay for!" and this is no Exception to reproductions, If you are wanting a clean new look I highly recommend ArcadeShop.Com

The Bondo Experience

Alright, So enough dragging my heels I started and finished the preliminary finish of Bondo. I had heard of this product in the past but had never put the two together until several posts from others restoring arcades had mentioned it. I had some good sized dings that needed fixed but I was thinking Wood filler but all the posts I saw suggested otherwise. I went ahead and purchased a quart of "Automotive" Bondo from walmart it was about $12 and was much more than I would ever use.

So I cleaned up the cabinet a bit surveyed all the damage, I used a sharpie to circle the spots on the sides to ensure i didn't miss anything and simply decided I would do just a side at a time. I also filled in the holes used for the horizontal mounting of the monitor, and just left the holes for the vertical mount. To those of you who have never used bondo before ensure you have good ventilation, the fumes this give off are obnoxious and can leave you with a headache! I am doing a restore in my basement i had to put a fan at the bottom of the stairs, open the basement door and the window in the kitchen adjacent to the door and suprisingly this worked well, it appears the fumes act like heat and rise and the smell was much more tolerable; though apparent it didn't give me a headache.

My biggest concern was on the back where it appears the machine was moved at one time without the back on that took a good size chunk out of the side board as it was not sturdy enough to support all the weight of the machine on itself. I needed to recreate the missing section, it wasn't thick enough to put a nail in to act as re-barb but i had to do with what i had. Now I understand this is not what Bondo is made for and that if the pressure was extreme enough would simply break that section out, but as the back is being fixed an a new lock is being placed It will never have the same pressure on that point again therefore I have little worries.

As you can see from the photos i started out by using two clamps and a piece of cardboard to line up with the exterior face of the board to give myself some backing to simply fill in, It worked out nicely and the cardboard came off easily leaving me with a flat surface on the outer edge. I let it dry and a little later applied another coat over it to fill it in a little more, with bond i would rather have to much than too little when it comes to sanding it out.


The next concern was the base board in the front of the machine, it appears it saw allot of people in
its years of use in the public. The edge of the board was pretty beat up from peoples feet kicking it over and over so i put a board directly under it to create a flat surface, then applied the bondo, it really didn't work out as well as I wanted it to so I just ended rounding the bondo out from the edge to create similar to a speed bump along the bottom edge and figured with that much excess i should be able to sand it out straight.

The top part of the cabinet took the most work but the least I'm concerned about, the plys started coming up from how old it is so i ensured the edges were squared off and simply used the bondo as a filler and it took a lot!!!! now this is the very top of the machine, again this is not what bondo's intended purpose was for but then again, no harm will ever be caused and when all sanded out I assume there will be some dips but I'm not going to focus to much on it as it will just be painted black making it more difficult to see.


Sanding The Cabinet

After thinking about sanding the cabinet down in the basement with little ventilation, I decided that probably wouldn't be one of my best ideas so i decided to move the cabinet out to my backyard patio to do the work where I wouldn't be inhaling a quart of smurf blood mixed with bondo. I started out using an old electric Makita Rotating sander but within 3 minutes the rubber parts of the spindle started flying off and after getting nailed in the back of the head I was sure it was time to just but that away and do it by hand :( 90 Degrees under the sun, my first burn of the summer.

I sanded the front first working on the bottom edge to flatten it out and get rid of the excess bondo and I'm pretty happy with the end result though not as "perfect" as I wanted, It will no longer be noticeable. The rest of the front went by good and no need for a second application for bondo to fill in those mysterious gaps that form when sanding it.

I next moved on to the top of the cabinet. This I knew would be a challenge for the sheer amount of bondo on it when trying to fill all the gaps from missing plys and the amount of time it took the bondo was not smooth as it was hardening as I was still applying so this part took awhile. I didn't care if the top was perfect, to clarify I didn't want any obvious signs a bad job was done but had somebody dragged their hand along the top and feel slight elevation differences that were not noticeable from 5 feet away I was fine. After all this was the top and will rarely ever be seen. It did in fact end up taking some time to get it sanded down, and required a 2nd application of bondo to fill in all the dips but the end result turned out better than i thought it would and there is now only one place i feel difference in height and that's in the middle of the large patch.

The back of the cabinet was really messed up from where the lock used latch behind at, it almost just seems as if they forgot to drop the latch on the cam and tried slamming it shut several times or some other abuse I'm unsure of. The bondo straightened it out though and with allot of sanding it turned out even across the entire back. You may notice a weird glob of bondo at the top left part that looks uneven and you would be correct! I had no idea that was even there till looking at the photos myself and have no clue what it is doing there, nothing needed patching in that spot so I suppose a little more sanding left.

The base of the cabinet is in good shape for the most part though there is a pretty good chunk out of one of the corners and could certainly use a little TLC but to me there really is no point as this is how the cabinet is moved and sits no matter how much effort i put into making it look new it will just get messed up again so I just did a moderate sand to the outer edges and the bottom stripping off the paint enough to apply primer and getting rid of the jagged edges and splinters of wood as in the end you will never see any of it anyway aside from a freshly painted base that still looks better than what was there previously.

So the Sides being the last were the most important to me and a friend came over to help me with them. It is very crucial that the surface remains even and the bondo is sanded down completely as not only are the sides the most notable it is where your side art is placed and any discrepancies will show through the side art from certain angles. In the end I think it turned out looking really good especially on the side where I had to create the false portion of the board that was missing. with as much shit the cabinet picked up over the last 30 some years I think it looks better dulled out with bondo spots than it before i started, I had to ensure the "Glossy" part of the Formica was sanded on every part leaving the dull scratched look giving the primer something to adhere to as if I were to just paint without sanding the paint would easily chip off and look like crap.

In the end things went pretty successful turned out to be a 5 hour job, next time i will have a power sander that works. I did mess up my pinky finger a bit when it slid off the sandpaper and caught about 10 slivers deep into the skin i have yet to remove and honestly not sure how I am going to at this point. I moved the cabinet back down to the basement and will be prepping the cabinet for painting as that is next!

Lower Bezel Support Frame/Bar

So today an envelope arrived with some samples I ordered in different thickness's in an effort to replace the original piece located on the board that supports the lower Bezel. For those not knowing what I'm talking about see the picture below. I really don't know what Nintendo originally applied to this piece of the cabinet could have been vinyl, plastic, or even a very thin lair of formica. The closest thing I could find was "ABS Plastic". So i contacted a company to ship out a few different sample sizes to get an idea of what i needed and it appears the .020 or .030 is the correct width.

 I will most likely stick with the .020" as I will be using contact cement to connect the piece after I order it custom size which i believe is 2x23 1/2". I figure if contact cement is what will be holding it up, there is such a slight difference that is unnoticeable; having a little less plastic to hold up will last longer after all this stuff is not cheap. Then again I am doing a "Restore" on the cabinet and I fully intend to bring the former glory of this cabinet back to its original brand new off the truck look as possible, I understand many individuals strip the piece, sand it smooth then paint it and are very happy with the look, but I just want a more authentic feel. Later this week I will begin the primer/paint process.

Purchasing the Paint Supplies, Not Happy with Pricing..

So today I went out to purchase all the supplies for the painting process of the cabinet and to say i was not in the least bit impressed with the amount everything cost me. After an hour of shopping I felt i had been taken advantage of without the proper use of lube! So was it the fact just the basic supplies and primer cost me $135? or was it the Gallon of Donkey Kong Blue paint that cost $60? I'll let you be the judge!

So here's the supplies purchased today: Kilz Original Primer, Mineral Spirits, Drop Cloth, Painters Tape, Sanding Block, 220 Sandpaper, 400 Sandpaper, Masking Paper, Respirator, Eye Protection, Paint Trays, Roller, 2 Packs Foam Roller Replacements, 2.5 Microfiber brush, 0000 Steel Wool. Lastly Color Matched paint from Sherwin Williams.

The most important thing to note is the use of Oil/Alkyd primer & paints in this process over latex.Those who know the true difference would understand exactly why I have chosen this type. Oil sticks to more surfaces than latex ensuring i get the primer to stick and stay to the side of the formica. As well in the end as formica I want a very hard / Solid smooth finish to replicate what was there and oil is the closest thing to replicate this. 

I got the color of blue off the net from another poster's Sherwin Williams paint. After searching all over looking at different codes I found his to look the closest to the true color. So a label pic was online and i simply copied all the information off of it and trust me it worked out to my benefit! The person who posted made a batch up back in 2008 used a product they had since discontinued and in order to be able to make the base I wanted the only thing he could use was direct to metal paint which just happens to be about $100 per gallon. Being the order # was on the label he looked it up found the account it was originally purchased under and took the price that was originally charged and that's what I paid I guess saving a little over $40 dollars.

Primer Phase 1

So with the cabinet set up in the garage on a 2X4 cut in half to help with painting the base I began the prep work. Now for those of you who have little experience with painting its very important to understand that painting is only 5% of the job, the rest is ALL prep work! This includes the sanding, cleaning, taping & masking everything up and ensuring you have the right paint on hand.

I started out with the foam roller on the cabinet applying the first coat as you can see from the pictures the blue is very much still apparent and that's absolutely fine! as I'm painting in a vertical position, I am applying "Thin coats" to avoid the paint from taking advantage of gravity and leaving me with a headache of an uneven surface. the roller worked great for the majority but had to switch to a brush for the "Black parts" such as the base and the inner extended parts of the side boards.

I left the 1st coat dry over night before coming back the next morning, lightly wet sanding (Barely anything at all as not much is on) and applying the 2nd coat. The nice thing about Kilz is that it is dry to the touch within 30 min and another coat can be applied within a couple hours. Though like any oil base its a few days drying before finally settling, thus I waited 6 hours, wet sanded lightly again, then applied the 3rd coat and the cabinet has been sitting to dry for 3 days now.

The pictures of the 3rd coat shows no more blue and continuously keeps getting smoother. I have also applied the same amount of coats to the back door of the cabinet. The door is looking great after some bondo application and a good sanding. The primer is fully dry by now and would be much easier simply sanding with 220 vs wet sanding  so that will be the next step then to apply a 4th coat of primer before moving to the paint.

Lastly I will "Lecture w/ good intentions" those who are considering doing a restore and are taking the step of painting the cabinet. I cannot stress enough how important the prep work to this project really is!!! It is important to know first thing this will be the absolute longest step in the restoration process. It's easy to start the project with intentions of achieving a great result then naturally beginning to hurry in effort to see your results but let me assure you "You Wont!" You will need to continuously remind yourself to slow down. If you don't, the results of your paint job will clearly show! I know you will want to slam as many coats of primer on as soon as possible, don't! be patient take a day or two between them. I know after painting your not gonna want to spend all that time sanding that cabinet down again, let alone between coats, But DO! the results will be rewarding!

More into this includes the quality of paint you use, buy cheap paint from home depot/lowes don't be shocked if your paint job looks cheap when your done. Use latex over oil don't be surprised if your cabinet seems to be tacky and have a texture, rather than being hard and smooth. Lastly do NOT use "Glossy" or "Sealer" afterwards, want more protection on that nice paint job? add another coat of oil paint! the more glossy you make the cabinet the more likely all those little imperfections are going to stand out and slap you in the face every time you get near it!

Please take my advise into consideration and I will be updating within the week with the next step of the primer process.

Devices Needed In Making a Popeye Cabinet a 60 in 1

Ok, So I know allot of people will be coming to my page simply to find out what I used in effort to make this possible as Nintendo cabinets are always the least desirable to convert and leave allot of headaches. As I mentioned in the beginning I intend to add this board without destroying the integrity of the cabinet and to ensure that at any given point the monitor can be flipped and popeye will play fine or a 2 board DK Set can easily be inserted and it will be a genuine dedicated DK Cab.

First Component needed: Popeye Power supply Conversion Kit From Arcadeshop LLC - Now those of you who own the PP-900A Power Supply know that the only thing coming out of there is +5V nothing else. The conversion kit is a PCB Board and a Switching power supply that allows you to just move the pins from the existing PS and plug them into the one they send you giving you the needed -5V + 12V for all the other Nintendo Boards. Now the Original Popeye cabinets include a "Full" harness that has all the pins any of the other cabinets have but instead of carrying -5V & 12V On pin 5&6 +5V just go through both. The difference comes from the edge plate the harness connects to and the corresponding pins that come off and attach to the board are different (The short harness). I will be disregarding the PCB Board, Edge Plate and Short harness and just leaving them intact inside the cage in the cabinet and focusing on the main harness itself.

The second part needed is "Nintendo Classic to JAMMA Cabinet Adapter" This adapter simply traces the Nintendo 22Pin Edge adapter leads over to the Jamma Standard including additional labeled pins to add more buttons, a pig tail to bypass the monitor Audio on the Sanyo EZ as well as a built in video inverter. Now remember that -5V & 12V I was discussing earlier that I needed to come from the harness? Well this is why. Though the Popeye Monitor already has an Inverter board on it the adapter is configured to use the -5 & 12 from pins 5 & 6 to power it, now though I can manually invert its not good to send the wrong voltages to anything and besides you will also need those 12V to power the jamma board as well so all around its a must otherwise in the end you would need an additional power supply to provide the correct voltages to a molex adapter, either way you will need it so why not just do it this way? Now as I was saying before you will need an additional button for the 60 in 1 so I'm thinking I might use the P2 button for S2 on the 60 in 1. Please take note this piece is hand made and only offered by Mark at Cambridge arcade, I personally have a very difficult time with his communication style as he will leave you in the dark and you will hear nothing from him for weeks then suddenly out of nowhere he will send a message telling you a batch was made and ready to ship. So please be prepared to be patient if you choose to order this part and dont expect to many E-Mails or much support but I can ensure you the instant he tells you to send him money your parts will be out the next day and he does in fact deliver.

Lastly is the coin counter though optional it will help keep things authentic and everything working. The Coin Counter in your cabinet is running from 24V - this is a problem as there is almost no Switching power supplies that offer this anymore. The easiest method is to simply switch it out with a 12V counter, that way you can continue to use the function of the coin door as well its an easy swap to put back on when wanting to switch back to authentic.

When I am completed with the Cabinet and have everything hooked up I will take detailed pictures and as well do a Video covering everything on the cabinet restoration and the electronics within the cabinet but I just wanted to give those seeing me in the middle of my restoration wondering how I got the 60 in 1 PCB to work a quick explanation as to what was going on, in the meantime I am still busy priming and painting the cabinet

Primer Finished & 1st Coat of Paint on!

Alright, well at this point I am so sick of sanding the damn sides after every coat just to ensure that once completely flat no edges or other parts show formica and its completely white. I have finally made it to that point after 5 coats of primer. After almost an entire gallon of Kilz I am finally ready to apply the paint. I think the biggest problems in the beginning happened to be the Foam rollers I was using, they left so many dimples in the dry finish you ended up having to sand about all of it off till it was flat again explaining why my garage floor went from cement to snow. I went back to the store and picked up some new Woven Mohair rollers titled "Mirror Finish" in hopes I would be looking at myself after a coat but sadly I was let down. Actually it worked allot better though not completely smooth, the paint defiantly was spread more even and very little needed to be sanded to make it smooth again as it did not leave a lot of little pits.

The last coat of primer was put on 2 Days ago so it was already dry and ready for me to sand today and after a good 2 hours of sanding I spent the next hour cleaning it all up and applying blue tape to all the edges ensuring I didn't get the paint where I didn't want it to be. The first coat I applied very lightly with as little paint as possible on all sides ensuring there may be more coats involved but there will be less sanding! I was a little shocked at the beginning as I felt it was much darker but I think it drys a tad bit lighter as these pics were taken right after I finished. I compared the photos with a picture of the cabinet before it was ever sanded in similar light and it looks like the color is spot on! remember lighting always effects the shade of the cabinet as well.

So in the picture to the left I have given you a comparison of the cabinet after it had the bondo applied before ever sanding it, so that was the original color, put up against the new fresh coat of paint that will most likely lighten up when dry its pretty damn close. So I am not worried and very satisfied with the shade. I will give it a couple days to dry before lightly wet sanding with 400 grit and then applying the second coat. In the meantime I will be finishing the control panel. 

Intermission & New Parts

So within the last few days I have just received 2 new parts needed for the cabinet. One being the "True Flat" T-molding that as to my understanding was specially manufactured by Bill over at Chomping quarters.Com. Unlike most people who sale white T-Molding in 9/16 calling it "Nintendo T-Molding" Bill has "9/16 "Offset for the Plywood cabinets as the original T-Molding was offset and 5/8 for the control panels. This -Molding as well is "Flat" all others I have ever seen are rounded, and though any new nice T-Molding looks great on the cabinet I wanted it to look more "Authentic.

If You have the plywood cabinet you can order 20ft of 5/8 and just trim the side of the T-Molding that over hangs a tad, this will as well be enough to cover the Control Panel and both Sides. Otherwise you can order the 9/16 & 5/8 for the control panel but the shipping prices are outrageous and will jack it up to nearly $40.

The other Part I received was Mark's "Jamma To Nintendo Classic Adapter" This part Saves "Soooo" much time in making a 60 in 1 possible with no chopping as it is a quick and simple plug and play solution that offers on board video and the options of adding extra buttons. There is also a pigtail with an adapter that connects directly to the speaker in order to bypass audio issues with running the sound through the audio board on the Sanyo EZ. From just looking at it I'm guessing Mark has the Boards manufactured then receives them blank, and solders all the components in. Needless Mark made a very ingenious simple design for allowing a Jamma Board into a Nintendo cab that no one else has chose to do or offer.

Control Panel Completed while 2nd Coat dries.

Since I got the T-Molding in I decided while the paint was drying on the cab it would be a perfect opportunity to fix up the control panel. Now the board has a black laminate finish that wasn't "too" bad, but it was really tore up on the edge where the T-Molding sat and eventually was coming off. This was a "Huge" eyesore and I suppose I could have did touch up paint but that never looks all that great when your looking straight at it so i just went ahead and did very light sanding simply to knock any crap off of it and get the splintered edge smooth again.

After sanding down the edge I went ahead and cleaned it up and applied Black adhesive vinyl to the top of it. The vinyl went on smoothly and turned out really nice! I figured as cheap as a sheet is if anything were to happen again it could be easily replaced and best of all unlike paint it covers the difference of thickness of the worn edge and looks flush with the T-Molding applied. I used an exacto knife to cut away the holes and joystick area, brought the vinyl down half way of the edges and cut there to ensure it kept a good hold and didn't just peal away from the edges over time.

With the vinyl on I carefully installed the buttons, joystick, wire harness, and other hardware including the brand new Control panel overlay! Just as I had mentioned before the carriage bolts and buttons covered up the offset printing so its impossible to see. The Control panel looks absolutely beautiful now I was really quite impressed with what a brand new CPO, T-Molding & Vinyl could do. I guess I was just so used to the beaten up popeye parts. I didn't make any adjustments to the joystick I have heard several people like to clean them up and apply new grease to them but the stick seems to move just fine to me. I have also heard other people having really bad results with grease after a bit it begins to give a gummed up sticky feeling, I really didn't want to risk it, but for those who are interested in making the joystick slick as silk I've seen the Bikers telethon lubricant works wonders. Now just one more coat of Blue paint to be applied  tomorrow :)

Blue Finished Now On to Black!

Finally! did I mention I'm not going to be painting another cabinet for awhile? 3 Weeks and finally done with the Blue! The final and 3rd coat was put on 2 days ago and will be sitting till Monday before I begin the black paint. The Enamel/Oil based paints take 3-5 days just to dry and wet sanding within the first week after a coat is placed is out of the question, it will just take the paint right off!

I think I did a pretty damn good job with the fact I was using a roller and
the surface turned out smooth and flawless but not without a lot of time consuming hand sanding. I decided to do just 3 thin coats as I found with oil based the more paint you put on top of the old coat does not make it any smoother it just requires a lot more sanding to flatten out. I'm glad I found this out early on and took thin coats as my first approach as I saved myself from having to spend an hour or more later down the road fixing it with 80 grit. On the down side though of that $60 gallon of paint I only ended up using less than a quart...I guess I will be prepared if for any reason I need a touch up or if I ever get another Nintendo cabinet that needs to be restored...lets hope that's no time soon.

So unlike I did with using oil based for the blue I will be using Latex (Semi Gloss) for the black, reasoning why, latex is cheaper, fast drying, less of a mess to clean up, easier to work with and correct, not as nearly visible as the blue and certainly hides almost all flaws and lastly I think it will look closer to the black that's inside the cabinet already (Not the edges). So I will be posting the pics on Monday when the paint is dry and I can get a good shot of the final look of Blue on the cabinet :)

The Black Is On........you know I'm singing that....

So alas! The Black is on the cabinet completing the paint job after 3 1/2 weeks its been real and not happening again anytime soon. Personally I'm more of a fan of laminate but we all know the issues between that and DK blue. I applied a latex paint over the kilz primer this time as I wanted faster drying times and I really didn't care of the quality so much on the sides as the original black paint was "Spray Paint" making it cheap and easy to fix if anything were to go wrong and less noticeable as the blue Sides and front.

I applied all the coats to the sides, top, base, and back door with a brush, I
figured it was pointless to buy a bunch of small rollers and try to get it, especially when rollers don't do tight edges all that well. Also for those out there that have tried to paint with a brush over paint that was applied with a roller to "Touch up" you will understand the two simply don't mix and there's no going back without sanding it out and reapplying a new coat. So knowing I wanted the paint to be consistent and look nice I just used a brush over all the surfaces. The first coat of black just barely went on showing so much white but made it easier by following the vertical lines left by the brushes to ensure that all the lines were straight and consistent.

The 2nd coat applied later that night pretty much covered it all up, though the downfall with brushes vs rollers it seems a lot harder to spot small lines of excess paint until it drys and looking straight at you I consistently went back over all surface dragging the excess paint to the edge then wiping it off with the brush and applying it somewhere else but i was left with a couple small spots of excess paint, luckily one is under the control panel on the side where unless you get down there you will never see and the other in on the bottom in the back. In the pic you see of the back cover it may look a little discolored, that is because that was the 3rd "Spot" coat where I enured all white from the primer had been completely covered. It has since dried and is solid black will post complete photos after I pull away all the prep masking.

Paint Finished but not without some new headaches...

Well the paint job has been finished...(kinda anyways..) but not without a few issues, oh restoration projects :/ always a fork in the road is there not? So the paint on the sides look amazing as well as on the front no problem with the blue, it comes more to the black paint. First off on the outer edges of the frame in the front when peeling off the painters tape a couple large strips of black latex decided to come off with it... surveying it I wasn't to thrilled but thinking about this a little more it's black latex, this will be very easy to get a small brush and touch up but if only it were that simple.


I haven't decided how i will fix the next problem or if I will attempt to fix it
at all for that matter but along both sides on the the very back edge is a slight line of black, what from? Well you see I taped to the edges and painted each side but what i didn't notice is that the back rounds a tad so if i remove the black i will be left with primer then i have to decide exactly just where i should be painting the blue till, seems like to much effort for something so small and barely noticeable. Though the largest problem comes from the edges and it makes me cringe to even think about it. I found that when applying the T-Molding to the sides the very edges of the paint begins to chip off :( and if i were to continue i would have this long line of cracked chips along the edges that will for sure look like shit no mater how you try to avoid it.

I stopped and have been thinking of somethings and decided I'm going to try a couple things first. I would first like to lightly run a razor around all the edges softly shaving the paint at a slant so less of it be subjected to chipping and taking more with it. another method will be looking into holding a piece of .020 ABS plastic between the edge of the molding and wood where the touch each other and using the mallet to only that point pull the plastic out and just softly push it into the groove. and lastly if all else fails I will have to resort to a touch up method and how i figure this will happen will be using the painters tape on the outer edge of the T-molding (Lower side) wrapping it around the top of the T_molding then putting it into place, from there, ever so lightly sand the chips down and reapply another coat of paint to the surface around the edges with a roller in hopes of matching the paint! Luckily enamel does not stick to the painter tape like latex.